
Red Light Hunting Techniques for Wild Hogs
Table of Contents
- Why Red Light Works for Wild Hogs: Vision, Spectrum, and Stealth
- The Best Red Lights for Hog Hunting: What Actually Matters
- How to Set Up Motion Activated Feeder Lights Without Spooking Hogs
- Using 850nm Infrared for Hog Hunting: Scopes, Limits, and Coexistence
- Night Hunting Regulations for Hogs: What to Verify Before You Go
- Common Mistakes That Cost Hunters Shots at the Feeder
- Frequently Asked Questions
Last Updated: October 14, 2026
Why Red Light Works for Wild Hogs: Vision, Spectrum, and Stealth
Red light hunting techniques for wild hogs start with one biological fact: hogs are nocturnal and are active in low-light conditions. Understanding light color and how illumination changes can help hunters choose a less disruptive feeder setup.
How Hog Eyes Process Light
Like other mammals, hogs use rod cells for low-light vision and cone cells for color detection (general vision research). Sudden changes in illumination may disturb animals feeding at night. Red light is not invisible to hogs, and their responses can vary with conditions and prior experience.
Red vs. Green: Practical Differences, Not Myths
Both red and green are legitimate choices for feeder illumination, and neither is universally superior. Hunters who run red often prefer it for close-range work where they want minimal disturbance; green can provide useful visible contrast for some shooters. The honest answer is that color matters less than how the light arrives. A sudden burst of either color may disturb hogs; gradual illumination is intended to reduce that disruption.
For general background on hog behavior and management, see Texas A&M AgriLife Extension’s feral hog research guidance on managing wild pig populations.
The Best Red Lights for Hog Hunting: What Actually Matters
The best red lights for hog hunting share three traits: controlled brightness, a beam that reaches the feeder without washing the approach, and a durable mounting system suited to outdoor use. Lumen output and beam throw get all the marketing attention, but a feeder light that jumps straight to full brightness undoes everything else.
Here is how to weigh the features that decide whether a light works in practice:
| Feature | Why It Matters | What to Avoid |
|---|---|---|
| Brightening behavior | Gradual ramp may reduce disturbance | Instant full-power switch |
| Beam throw | Lights the feeder, not the trail | Wide flood that hits approaching hogs |
| Wavelength | Red, green, or 850nm IR options | Single fixed color with no flexibility |
| Power source | Solar charging can extend time between battery maintenance | Frequent manual charging |
| Mounting hardware | Feeder, T-post, tree, fence options | One-size bracket that fits nothing |
Hogfader builds feeder lighting around controlled activation. The Hogfader Illuminator uses No-Spook technology, gradually increasing brightness over approximately 70 seconds, holding illumination for about two minutes, and then fading down. It is offered in red and green, uses motion detection and automatic day/night sensing, and can be paired with an optional solar-powered mounting kit.
Pro Tip
Mounting height changes everything. A light set too low throws its beam across the approach path and lights hogs before they commit to the feeder. Aim the beam down onto the feed, not out toward the treeline.
Mounting height changes everything. A light set too low throws its beam across the approach path and lights hogs before they commit to the feeder. Aim the beam down onto the feed, not out toward the treeline.
How to Set Up Motion Activated Feeder Lights Without Spooking Hogs
Setting up motion activated feeder lights correctly means the light reveals the feeder, not the hogs walking to it. Get the geometry wrong and even a gradual-ramp light will push animals off. This is the part most guides skip: not which light to buy, but where it points, how it triggers, and how you use it once hogs are on the feed.
Beam Geometry: Aim at the Feed, Not the Approach
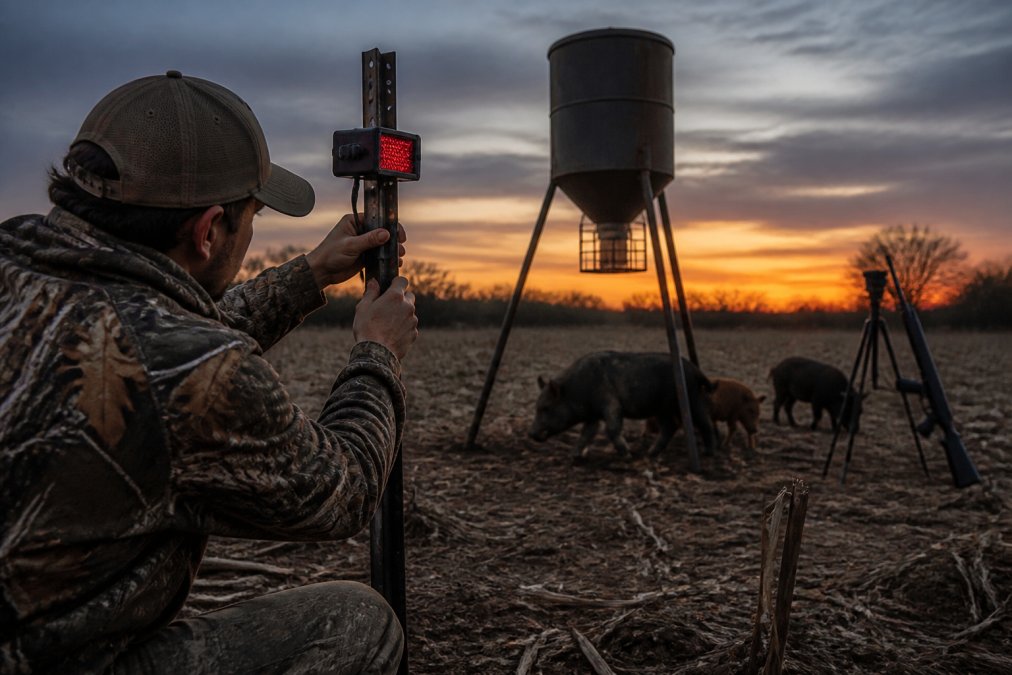
One common mistake is a light mounted at eye level facing the direction hogs come from. That turns the fixture into a spotlight aimed at the animal and lights the approach lane before the hog commits. The fix is counterintuitive: mount the light above and slightly behind the feeder, angle it down onto the feed pile, and leave the approach in shadow. A hog walking in from darkness into a softly lit feed pile reads the change as ambient, not as a threat.
A practical sequence looks like this:
- Position the light above and slightly behind the feeder so the beam falls onto the feed pile.
- Angle the fixture downward so the approach lane stays in shadow.
- Set sensitivity so motion at the feeder triggers the light, not movement 30 yards out.
- Test the motion trigger and light sequence after dark, when the day/night sensor permits operation.
- Test with a trail camera for a few nights before you hunt the setup.
Beam Distance and Intensity: Match the Light to the Shot
Brightness is not the goal; usable illumination at the distance you actually shoot is. A light that floods 40 yards of open ground washes out detail and increases disturbance. A light that throws a tight beam to the feed pile at 25 to 40 yards gives you a clean sight picture without lighting everything behind the hog.
Think in terms of the job:
- Close feeder setups (roughly 20-40 yards): you need enough light to place a shot, not enough to illuminate the treeline. A downward-angled fixture at moderate output is usually plenty.
- Longer shots (roughly 75-150 yards): you need more throw and a tighter beam, and you need the light mounted high enough that the beam reaches the feed without crossing the approach.
- Night vision setups: the illuminator’s job is to feed the scope, not the naked eye. Match the illuminator’s wavelength to your tube’s sensitivity and let the scope do the work.
More lumens is not automatically better. Too much spill light can make the feeder area harder to observe and may disturb animals.
Light Discipline and Scan Patterns
Light discipline is the practice of controlling when, where, and how long your illumination runs, and it is the technique most hunters never think about. Constant illumination and sudden changes in light can affect animal behavior. Motion-activated gradual illumination is designed to reduce abrupt changes at the feeder.
Scan patterns matter too. Sweeping a handheld or weapon-mounted light across a field telegraphs your position and lights everything you are not shooting. Instead:
- Keep the beam fixed on the feeder zone and let the feeder light do the work.
- Use a headlamp on low for navigation only, and keep it off once you are set.
- Avoid sweeping the treeline; if you need to check the approach, do it with night vision or thermal, not with a visible beam.
- When you do need a handheld light, use short, deliberate bursts rather than long sweeps.
This is where a purpose-built feeder light beats a DIY floodlight or an ordinary motion light. The fixture is designed to sit still and ramp gradually, not to be swung around by hand or to snap on at full brightness the instant a sensor trips.
Mounting Positions That Keep the Beam Off Approaching Hogs
Higher mounting on a feeder leg, tree trunk, or T-post, angled down, keeps the illumination on the feed and leaves the approach dark. Hogfader’s mounting options cover feeders, tree trunks, T-posts, fences, and tree branches, which gives you room to find that angle on tight properties where the “ideal” setup does not exist.
Watch Out
Animals may respond differently to continuous lighting and abrupt illumination. Observe activity with a trail camera and adjust your setup as needed.
Animals may respond differently to continuous lighting and abrupt illumination. Observe activity with a trail camera and adjust your setup as needed.
Using 850nm Infrared for Hog Hunting: Scopes, Limits, and Coexistence
For compatible infrared-sensitive digital night vision equipment, 850nm IR illumination can provide reflected light without flooding the feeder with visible red or green light. Check the specifications of your particular light and optic before choosing an IR setup. The Hogfader Platinum has an IR configuration. An 850nm emitter may still show a faint red glow.
One honest caveat: 850nm IR is not completely invisible. An 850nm LED emitter can produce a faint visible red glow, and some animals may notice it. It is far less conspicuous than white light, but do not treat it as undetectable.
Infrared vs. Thermal: Two Different Tools
Infrared night vision and thermal imaging are not the same technology. IR night vision amplifies reflected infrared light and needs an illuminator to see in total darkness, which is exactly what an 850nm emitter provides. Thermal optics detect heat signatures and require no illuminator at all. Hunters sometimes assume a thermal scope makes an IR light pointless, but the two solve different problems. Thermal finds the animal; IR night vision lets you identify and place a shot with detail.
U.S. Fish & Wildlife Service guidance on invasive species management notes that feral hogs are a widespread invasive species, which is why so many states allow and even encourage removal.
Night Hunting Regulations for Hogs: What to Verify Before You Go
Night hunting regulations for hogs vary by state and locality, and assuming they are uniform is a mistake that can cost you more than a hunt. Some states allow night hunting of feral hogs year-round with no permit; others restrict it to certain seasons, require a license, prohibit artificial light entirely, or limit which methods are legal.
Before you set up, check three things: whether night hunting for hogs is legal in your state, whether artificial light or night vision is permitted for the method you plan to use, and whether your county or wildlife management area adds its own restrictions. Landowner permission rules differ too. Treat any claim that “night hog hunting is legal everywhere” as false. Verify with your state wildlife agency, not a forum thread.
Common Mistakes That Cost Hunters Shots at the Feeder
Most missed opportunities trace back to a handful of avoidable errors, and nearly all of them involve light rather than shooting skill.
- Instant-on lighting. A sudden change to full brightness may startle hogs.
- Wrong mounting angle. Beams aimed at approach lanes can create unnecessary light spill.
- Over-lighting the area. More brightness is not better; it washes out detail and increases disturbance.
- Ignoring wind and scent. Light discipline does not matter if your scent is blowing into the feeder.
- No scouting. Running a setup blind means you learn the property at the worst possible moment.
- Skipping the legal check. Assuming regulations are the same as a neighboring state can end a hunt early.
The throughline across all of these is the same: hogs respond to disturbance, and light is disturbance. A light that arrives gradually, stays aimed at the feed, and runs only when animals are present gives you the calm, repeatable shot opportunity that sudden lights destroy. That is the design goal behind Hogfader’s No-Spook illumination, and it is why hunters who have fought spooky hogs at the feeder tend to switch once they see the difference.
Managing feral hogs at night comes down to controlling disturbance, and light is the disturbance you can actually control. If your current setup is still spooking sounders the moment it triggers, Hogfader builds lighting around the problem: the Illuminator’s No-Spook gradual ramp, red, green, and optional 850nm IR illumination on compatible models, solar-powered mounting, and the Platinum’s integrated Wi-Fi camera that streams live video and captures photos without cell service or internet. Get started with Hogfader and set up a feeder light that keeps hogs calm instead of scattering them.
Frequently Asked Questions
What color light is best for hog hunting?
There is no single best color for every setup. Red light is the traditional choice because hogs have limited red-sensitive photoreceptors, so it tends to disturb them less than white light. Green is also a legitimate option and many hunters find it easier to see through. The bigger factor is how the light turns on. A light that jumps straight to full brightness, in any color, can spook a sounder. HOGFADER’s No-Spook illumination raises output gradually over roughly 60 to 90 seconds, which keeps hogs calmer while they stay at the feeder.
Does red light scare hogs?
Some hunters prefer red light to white light for nighttime feeder setups, but the way the light activates matters just as much as the color. A sudden flood of red light can still send a sounder running. Gradual illumination is the difference. HOGFADER’s Illuminator brings light up slowly over about 60 to 90 seconds, so hogs that are already at the feeder are less likely to bolt. Pair that with steady light discipline and a beam that stays off approach lanes, and observe how animals respond at your particular feeder.
How does gradual illumination improve hog hunting success?
Hogs are nocturnal and rely on sudden changes in their environment as a warning signal. When a conventional motion light snaps on at full power, that abrupt shift triggers a flight response. Gradual illumination is intended to make the change in brightness less abrupt. HOGFADER built its No-Spook technology around this behavior, ramping up over roughly 60 to 90 seconds. This can help create a more consistent viewing environment at the feeder.
What are the benefits of using infrared vs. red light for hogs?
Red light can be used with the naked eye and conventional visible-light optics. An 850nm IR illuminator is intended for compatible infrared-sensitive night vision equipment; it is not needed for thermal optics. An 850nm emitter may produce a faint red glow. Check the specific Hogfader product configuration before choosing IR.